
grasslin timer instructions manual
Welcome to the Grasslin Timer Instructions Manual! This guide provides comprehensive instructions for installing, programming, and maintaining your Grasslin Timer. Ensure safe and efficient operation by following these detailed steps.
What is the Grasslin Timer?
The Grasslin Timer is a versatile and reliable timing device designed for controlling electrical systems, particularly in commercial and industrial applications. It offers both digital and mechanical options, catering to different user preferences and system requirements. Known for its multi-voltage compatibility, the Grasslin Timer can operate efficiently across various electrical setups, making it a flexible solution for diverse environments. It is also compatible with defrost systems, ensuring precise control over defrost cycles in refrigeration and HVAC applications. The timer’s robust design and user-friendly interface make it a popular choice for managing operations that require precise timing and reliability. Its applications range from simple on/off control to complex scheduling for industrial processes, ensuring efficient and consistent performance.
Purpose of the Grasslin Timer Instructions Manual
This manual serves as a comprehensive guide to help users understand and effectively utilize the Grasslin Timer. It provides detailed instructions for installation, programming, and troubleshooting, ensuring optimal performance. Designed for both professionals and DIY enthusiasts, the manual covers essential features, safety protocols, and maintenance tips. Whether you’re setting up a new timer or resolving operational issues, this guide offers clear, step-by-step directions. Its purpose is to empower users with the knowledge needed to configure and maintain their Grasslin Timer confidently. By following the instructions, you can ensure safe, efficient, and reliable operation of your timer in various applications, from industrial systems to household appliances.

Features of the Grasslin Timer
The Grasslin Timer offers multi-voltage compatibility, supporting various electrical systems. It is designed for use with defrost systems, including air, electric, and hot gas defrost configurations. Digital and mechanical options are available, catering to different user preferences and applications. The timer’s robust design ensures reliable performance in diverse environments, making it suitable for both industrial and household use. Its advanced features include customizable programming options and integration capabilities with other systems, enhancing flexibility and efficiency.
Digital vs. Mechanical Timer Options
The Grasslin Timer is available in both digital and mechanical versions, catering to different user needs. Digital timers offer advanced programmability, precise time control, and customizable settings, making them ideal for complex schedules. They often feature backlit displays for easy readability and can store multiple programs. Mechanical timers, on the other hand, provide simplicity and reliability, with straightforward dial-based controls. They are cost-effective and require no battery replacements, making them a practical choice for basic timing needs. Both options are designed for durability and compatibility with multi-voltage systems, ensuring versatile application across various environments. Choose the option that best fits your specific requirements for optimal performance.
Multi-Voltage Compatibility
The Grasslin Timer is designed to operate across a wide range of voltage inputs, ensuring compatibility with various electrical systems. This feature allows the timer to function seamlessly in different regions and setups, from standard household voltages to industrial applications. Multi-voltage compatibility enhances flexibility, reducing the need for multiple timer units. It supports both 120V and 240V systems, making it suitable for diverse installations, including residential and commercial environments. This adaptability ensures reliable performance regardless of the power supply, providing users with a versatile and efficient timing solution. The timer’s robust design handles voltage fluctuations without compromising functionality, making it a reliable choice for universal applications.
Defrost Systems Compatibility
The Grasslin Timer is fully compatible with various defrost systems, ensuring seamless integration into your existing setup. It works efficiently with air defrost systems by shutting down the compressor during the defrost cycle. Additionally, it is compatible with electric and hot gas defrost systems, where the defrost process can be terminated either by the timer or when a specific condition is met. This versatility makes the Grasslin Timer suitable for a wide range of applications, from commercial refrigeration to industrial setups. Its compatibility with defrost systems ensures optimal performance, energy efficiency, and precise control over defrost cycles, making it a reliable solution for maintaining operational consistency.
The Installation Guidelines section outlines the essential steps for successfully setting up your Grasslin Timer, ensuring proper preparation, mounting, and configuration for optimal performance and safety.
Pre-Installation Checks
Before installing your Grasslin Timer, perform a series of pre-installation checks to ensure a smooth and safe setup process. Verify that all components are included in the packaging and inspect for any damage. Check the voltage rating of the timer to ensure compatibility with your electrical system. Consult the manual to confirm the timer’s compatibility with your specific application, such as refrigeration or HVAC systems. Ensure the installation location is accessible, well-ventilated, and free from extreme temperatures or humidity. Disconnect power to the circuit before starting work and use lockout/tagout procedures if necessary. Finally, review the installation manual thoroughly to understand the requirements and safety precautions. Proper preparation ensures a safe and efficient installation process.
Step-by-Step Installation Process
Begin by disconnecting the power supply to the circuit to ensure safety. Locate the Grasslin Timer’s installation site near the controlled device; Mount the timer using the provided hardware, ensuring it is securely fastened to a clean, dry surface. Connect the wires according to the wiring diagram in the manual, ensuring live, neutral, and load wires are correctly linked. Tighten all connections firmly to prevent loose wires. Once wired, set the timer by following the on-screen prompts to configure the clock, date, and desired on/off cycles. Restore power and test the timer’s operation to confirm proper functionality. This step-by-step process ensures a safe and correct installation of your Grasslin Timer.
Post-Installation Testing
After completing the installation, perform a thorough test to ensure the Grasslin Timer functions correctly. Begin by verifying the power supply is stable and the timer is receiving the correct voltage. Check all connections for tightness and integrity. Turn the timer on and test basic functions, such as switching the load on and off manually. Confirm the display is clear and responsive, with no malfunctioning segments. Test programmed settings to ensure the timer activates and deactivates according to the configured schedule. If applicable, simulate a defrost cycle to verify proper operation with defrost systems. Address any issues promptly and consult the troubleshooting section if necessary. Proper testing ensures reliable performance and prolongs the timer’s lifespan.

Programming the Grasslin Timer
Programming the Grasslin Timer involves setting the clock and configuring schedules. Start by setting the current time and date accurately. Next, use the basic functions to set on/off times. For advanced options, create multiple cycles or day-specific schedules. Ensure the display is clear and test settings by simulating time changes. Refer to the manual for safety guidelines and troubleshooting tips, and document your settings for future reference.
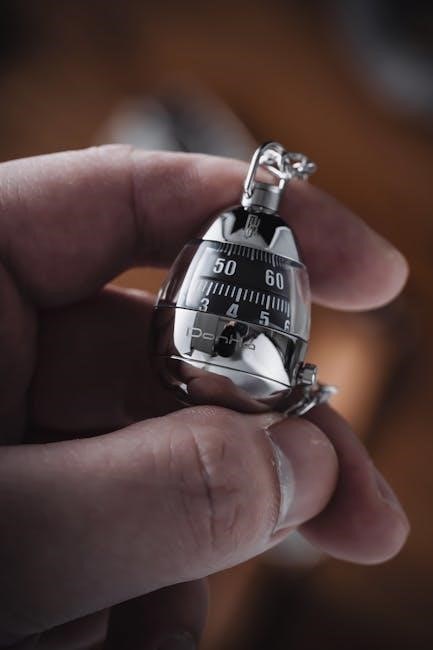
Setting the Clock and Date
To set the clock and date on your Grasslin Timer, start by pressing and holding the “Set” button until the display flashes. Use the arrow keys to adjust the hour and minutes, selecting either 12-hour or 24-hour format as specified in the manual. Press “Set” to confirm the time. Next, press “Set” again to access the date settings. Enter the correct year, month, and day using the arrow keys. Ensure the correct AM/PM period is selected if applicable. Finally, press and hold “Set” until the display stops flashing to save your settings. Check if automatic daylight saving adjustments are available or if manual updates are needed semi-annually. Always refer to the manual for precise instructions to avoid errors and ensure accurate timekeeping.
Basic Programming Functions
The Grasslin Timer offers straightforward basic programming functions. Begin by accessing the programming mode via the “Prog” button. Select the desired program number using the navigation arrows, ensuring it matches your specific application needs. Set the “On” and “Off” times by navigating through the hours and minutes, confirming each selection with the “Set” button. Choose between daily, weekly, or one-time operation modes. To save, press and hold “Set” until the display stops flashing. Review settings using the “Prog” button to cycle through programmed times. Ensure all settings align with your schedule and application requirements. Refer to the manual for detailed steps to avoid programming errors and optimize timer functionality.

Advanced Programming Options
The Grasslin Timer allows for advanced programming to meet specific operational needs. Users can create custom schedules with multiple on/off events per day, tailored to precise requirements. Weekly programming enables selection of specific days for operation, ensuring flexibility. For defrost systems, advanced settings allow adjustment of cycle intervals and duration. Special modes, such as vacation or holiday programming, can be activated to maintain operations during inactive periods. Remote control integration is also supported for enhanced convenience. To access these features, navigate to the advanced menu using the “Prog” and “Set” buttons. Save custom configurations by holding the “Prog” button until confirmation is displayed. Always review settings before saving to ensure accuracy and proper functionality. Refer to the manual for detailed instructions on utilizing these advanced features effectively;

Troubleshooting Common Issues
Identify issues by checking power supply, connections, and settings. Review error codes or unusual behavior. Reset the timer or consult the manual for specific solutions.
Timer Not Turning On
If the Grasslin Timer fails to turn on, ensure it is properly connected to a power source. Check for blown fuses or tripped circuit breakers. Verify that the outlet is functioning by testing it with another device. For battery-operated models, ensure batteries are installed correctly and are not depleted. If the timer uses a display, check for any signs of life, such as LED indicators or a dim screen. Review the programming settings to confirm the timer is not in an “OFF” or “STANDBY” mode. If issues persist, consult the manual or contact customer support for further assistance.
Issues with Defrost Cycles
If the Grasslin Timer experiences problems with defrost cycles, first check the temperature settings to ensure they are configured correctly. Verify that the defrost mode is enabled and properly programmed. If the timer fails to initiate defrost cycles, inspect the sensor connections for any damage or corrosion. Ensure the defrost duration and frequency align with the system’s requirements. If issues persist, review the timer’s compatibility with your specific defrost system. Resetting the timer or updating its firmware may resolve the problem. Always refer to the manual for model-specific defrost cycle settings and troubleshooting steps. If problems continue, contact technical support for assistance.
Display Malfunction
A display malfunction on the Grasslin Timer can manifest as a blank screen, incorrect time/date display, or flickering. First, ensure the timer is properly powered and all connections are secure. Restart the timer by turning it off and on again. If the issue persists, check for loose wires or corrosion in the circuit. Verify that the display brightness settings are adjusted correctly. In some cases, resetting the timer to factory settings may resolve the problem. If the display remains unresponsive, it could indicate a hardware failure. Contact Grasslin customer support for repair or replacement options. Always refer to the manual for specific reset instructions to avoid further complications.

Maintenance and Care
Regular maintenance ensures optimal performance of the Grasslin Timer. Clean the display with a soft cloth and avoid harsh chemicals. Check for dust buildup and ensure proper ventilation. Inspect wiring for damage and secure all connections. Perform routine firmware updates and battery replacements as needed. Store the timer in a dry, cool environment when not in use. Refer to the manual for specific care instructions to extend the product’s lifespan and maintain accuracy.
Cleaning the Timer
Cleaning the Grasslin Timer is essential for maintaining its functionality and appearance. Use a soft, dry cloth to wipe the display and exterior surfaces. For tougher stains, lightly dampen the cloth with water, but avoid submerging the timer or using harsh chemicals. Never spray liquids directly onto the timer, as this could damage internal components. For the exterior casing, a lightly dampened cloth with a mild soap solution may be used, but ensure it is thoroughly rinsed and dried. Avoid abrasive materials or rough cloths that could scratch the surface. Regular cleaning helps prevent dust buildup and ensures accurate operation. Always refer to the manual for specific cleaning recommendations to avoid voiding the warranty.
Replacing Batteries
To ensure uninterrupted operation, replace the Grasslin Timer batteries as specified in the manual. Locate the battery compartment, typically found on the rear or underside of the timer. Open the compartment by sliding or lifting the cover. Gently remove the old batteries, noting their orientation for correct installation. Insert the new batteries, aligning the plus and minus signs accordingly. Close the compartment securely. Test the timer to confirm proper function. Use high-quality batteries of the correct type to maintain performance. Keep spare batteries handy for quick replacement. Always follow safety guidelines to avoid electrical issues. Proper battery maintenance ensures accurate timer operation and longevity.
Updating Firmware
Regular firmware updates ensure your Grasslin Timer operates with the latest features and security patches. To update, visit the manufacturer’s official website and download the newest firmware version compatible with your timer model. Transfer the firmware file to a USB drive or SD card, depending on the timer’s compatibility. Insert the storage device into the timer’s port and navigate to the firmware update option in the settings menu. Select the file and follow on-screen instructions to complete the update. Avoid interrupting the process to prevent data corruption. Once updated, restart the timer to apply changes. Always verify the firmware version post-update to ensure success. For detailed steps, refer to the manual or contact support. Regular updates maintain optimal performance and functionality.
Safety Precautions
Always disconnect power before servicing. Avoid water exposure and ensure proper grounding. Follow manual guidelines to prevent electrical hazards and device damage. Wear protective gear when handling.
Electrical Safety Guidelines
- Always disconnect the power supply before performing maintenance or repairs to avoid electrical shock.
- Avoid exposing the timer to water or moisture, as this can cause malfunction or electrical hazards.
- Ensure the timer is properly grounded to prevent damage from voltage surges or short circuits.
- Wear insulated gloves and protective eyewear when handling electrical components.
- Never touch electrical connections with wet hands or while standing on a wet surface.
- Check for any signs of wear or damage on cables or connections before use.
- Ensure all electrical work is performed by a licensed professional to comply with safety standards.
Handling the Timer Safely
- Use protective gloves and eyewear when handling the timer to prevent injury from sharp edges or accidental electrical discharge.
- Avoid touching the timer with wet hands or in humid environments to minimize the risk of electrical shock.
- Always lift the timer with both hands to prevent accidental drops and damage.
- Inspect the timer for visible damage before handling. If damaged, do not use it until repaired by a professional.
- Store the timer in a dry, cool place, away from direct sunlight and moisture.
- Never touch internal components without proper tools, as this can cause personal injury or damage to the device.
- Ensure the area is well-ventilated and free from flammable materials when handling the timer.
- Avoid unauthorized modifications or repairs, as this can compromise safety and functionality.
Emergency Shutdown Procedures
In case of an emergency, follow these steps to safely shut down the Grasslin timer:
- Immediately disconnect the timer from the power supply by pulling out the plug or switching off the circuit breaker.
- If the timer is hardwired, switch off the main electrical supply to the system at the circuit breaker or fuse box.
- Stop any connected appliances or systems to prevent further operation.
- Do not attempt to restart the timer until the issue has been identified and resolved by a qualified technician.
- Ensure the timer is completely powered down before handling it to avoid electrical shock.
- Consult the manual or contact Grasslin support for specific instructions related to your model.
- Verify that all safety protocols are followed before resuming normal operation.
Always prioritize safety and adhere to local electrical regulations during an emergency shutdown.

Compliance and Regulations
The Grasslin timer is designed to meet international safety and environmental standards, ensuring reliable performance while adhering to regulatory requirements for electrical devices.
Meeting Local Electrical Codes
Ensuring the Grasslin timer complies with local electrical codes is essential for safe and legal installation. Verify that the timer’s voltage rating matches your electrical system. Always follow regional regulations regarding wiring and device certification. Proper installation by a licensed electrician is recommended to avoid code violations. Familiarize yourself with local standards for programmable timers and defrost systems. The Grasslin timer is designed to adapt to various electrical systems, but adherence to specific codes is your responsibility. Consult local authorities or certified professionals if unsure about compliance requirements. This ensures safety, avoids legal issues, and guarantees optimal performance of the timer in your application.
CE and UL Certifications
The Grasslin timer is certified with both CE and UL markings, ensuring compliance with rigorous safety and performance standards. The CE certification confirms that the timer meets European Union directives for health, safety, and environmental protection. UL certification, from Underwriters Laboratories, verifies that the timer adheres to safety standards in North America. These certifications guarantee that the Grasslin timer has undergone extensive testing for reliability and safety. Users can trust that the timer operates within defined parameters, minimizing risks of electrical hazards. These recognitions also facilitate compliance with regional regulations, making the Grasslin timer a reliable choice for industrial and commercial applications worldwide. Always look for these certifications to ensure authenticity and safety.
Environmental Compliance
The Grasslin timer is designed to meet stringent environmental regulations, ensuring minimal ecological impact. It complies with global standards for energy efficiency and hazardous substance reduction, such as RoHS (Restriction of Hazardous Substances). The timer’s eco-friendly design minimizes power consumption and promotes sustainable operation. By optimizing energy use, it helps users reduce their environmental footprint. Additionally, Grasslin timers are constructed with recyclable materials, supporting environmentally responsible disposal. Proper disposal guidelines are provided to ensure compliance with local recycling regulations. This commitment to environmental compliance underscores Grasslin’s dedication to producing products that align with global sustainability goals while maintaining high performance standards. Always follow the manufacturer’s guidelines for disposal and recycling.
Advanced Features and Customization
The Grasslin timer offers programmable cycles, multi-event scheduling, and customizable settings to tailor automation for specific needs. Advanced features enable seamless integration with smart systems for enhanced efficiency and control.
Customizable Timers for Specific Applications
The Grasslin timer is designed to adapt to various applications, offering customizable settings for defrost systems, HVAC, lighting, and industrial processes. Users can program cycles to suit specific needs, ensuring optimal performance. Digital models provide multi-event scheduling, enabling precise control over operations. The timer supports customizable start/stop times, cycle durations, and repeat intervals, making it versatile for diverse applications. Advanced models allow integration with external sensors and controllers, enhancing functionality. Whether for refrigeration, HVAC, or industrial automation, the Grasslin timer can be tailored to meet unique requirements, ensuring efficient and reliable operation. This adaptability makes it a versatile solution for both simple and complex systems.
Integration with Other Systems
The Grasslin timer is designed to seamlessly integrate with various control systems, enhancing its functionality in complex environments. It supports communication protocols such as Modbus and BACnet, enabling connection to building management systems (BMS) and IoT platforms. This integration allows for real-time monitoring and control, ensuring synchronized operations across multiple devices. The timer can also interact with sensors, relays, and programmable logic controllers (PLCs), making it a versatile component in automated systems. Additionally, its compatibility with external inputs, such as analog signals and digital commands, ensures smooth operation within larger networks. This adaptability makes the Grasslin timer an ideal solution for integrating into existing or new installations, providing enhanced control and efficiency.
Remote Control Options
The Grasslin timer offers remote control options for convenient operation, enhancing user flexibility. Users can utilize dedicated remote controllers or smartphone apps to adjust settings, monitor status, and receive notifications. The timer supports wireless communication methods such as Bluetooth, Wi-Fi, or infrared (IR), ensuring reliable connectivity. Remote access allows for real-time adjustments, scheduling changes, and monitoring of timer operations from a distance. This feature is particularly useful for industrial or commercial settings where direct access to the timer may be challenging. Additionally, remote control options enable integration with smart home or building automation systems, further streamlining control and energy management. This functionality ensures efficient operation and reduces the need for physical interventions.

Warranty and Support
Grasslin timers are backed by a comprehensive warranty and dedicated customer support. The warranty covers manufacturing defects for a specified period, ensuring reliability and performance. Support includes access to online resources, troubleshooting guides, and direct assistance from certified professionals to address any concerns promptly and effectively. This ensures users can rely on their Grasslin timer for consistent operation and receive help whenever needed.
Understanding the Warranty Terms
The Grasslin timer warranty provides protection against manufacturing defects for a specified period, ensuring your device operates as intended. Coverage typically includes repairs or replacements for faulty components. To maintain validity, users must adhere to installation and usage guidelines outlined in the manual. Registration may be required to activate the warranty, and proof of purchase is often necessary for claims. Exclusions may apply for damage caused by misuse, tampering, or external factors. Understanding these terms ensures clarity on what is covered and how to address potential issues effectively. Reviewing the warranty document carefully helps users make informed decisions and utilize the support available to them.
Contacting Customer Support
Contacting Grasslin customer support is straightforward for assistance with your timer. Support is available via phone, email, or through the official website. For urgent inquiries, the 24/7 hotline ensures immediate help. Technical support specialists are trained to address installation, programming, and operational issues. When reaching out, have your timer model, serial number, and a detailed description of the issue ready. Online support resources, including FAQs and troubleshooting guides, are also accessible. For warranty-related inquiries or repair requests, contact the support team directly. They can guide you through the process and provide necessary documentation. Visit the official Grasslin website for contact details and additional support options to ensure your timer operates smoothly.
Online Resources and FAQs
Grasslin provides comprehensive online resources and FAQs to help users navigate their timer instructions manual effectively. The official Grasslin website offers downloadable PDF manuals, troubleshooting guides, and video tutorials. These resources cover topics such as installation, programming, and maintenance. FAQs are categorized for easy access, addressing common issues like timer setup, defrost cycles, and display malfunctions. Additional resources include user forums and knowledge bases where experienced users share tips. The online portal is available 24/7, ensuring quick access to solutions. By utilizing these resources, users can resolve issues independently, saving time and ensuring optimal performance of their Grasslin timer. Regular updates keep the information current and relevant.